Showing posts with label DIY. Show all posts

November 21, 2013

DIY Peter Pan and Tinkerbell Costumes


Homemade Halloween costumes are the best! This year Halloween coincided nicely with Bea's current movie obsession - Peter Pan. (I'm not complaining!) Here is what I came up with for a quick and easy  DIY Tinkerbell and Peter Pan Halloween costume. 

DIY Peter Pan Costume:
  • Green felt for the hat - two layers, cut out a triangle hat shape and go for it. Sew the triangle, and then finish the edges after trying it on to make sure it's the right shape. I cut a little hole in the side of the hat to stick the red feather into. Jack kept his hat on for 10 seconds at a time. : ) Extra feathers come in handy. 
  • Simple, green cotton fabric for the shirt - I folded the fabric in half, laid one of his bigger shirts down on top of it so that the shoulders lined up with the fold in the fabric, and traced a line around the shirt. Leave it long, like dress length. I then cut the fabric with about 1.5-2" extra around the border. Cut a hole for the head using the shirt you used to trace as a template. Then cut a deep "V" neck. Sew around the cut edges, leaving the head, arm and torso holes open, of course. Turn inside out and cut "V"s out of the edges the sleeves and torso. Take the top points of the "V"neck and tack them down with a few stitches to create little lapels. If the head hole isn't big enough to go over your little guys head (my baby has a huge head!), then just make the "V" deeper and you can always use leather string to lace it back up, if necessary. 
  • Leather rope for belt - I found some at Hobby Lobby. Don't forget your wooden knife. : ) 
  • Little girl leggings - Men in tights are the cutest. I had to get brown because green leggings are hard to find.

DIY Tinkerbell Costume:
  • Plain, lime green T-shirt - The one I used was over-sized (like a youth L), and I cut it to make it fit. First I cut off the neck and sleeves so that those finished edges were gone. Then I laid down one of her dresses/shirts on top of the T-shirt and traced around it, and cut around the edges with 1.5-2" extra around the border. I re-sewed the edges and finished the sleeves with a simple stitch around the perimeter. Instead of finishing the neck in the same way, I used an elastic ribbon and sewed it on top of the edge of the neck. I kept the shirt long, like dress length, and cut out a "V" pattern on the bottom edge. This gave a little extra coverage with the sheer tutu, but she wore some little shorts too.
  • Green tulle and elastic for the tutu - I used two different shades - a lime green and a kelly green. For the most part, I used this tutorial to make the tutu. Basically, I just sewed a waistband of elastic (I used 1" wide), cut tulle into strips of different widths and lengths, and then tied them on to the elastic band. I did longer pieces first, and then shorter pieces on top. I cut the ends so that they came to a point. To make it look more finished I sewed elastic ribbon on top of the waistband, but make sure you are happy with the fluffiness of the tutu because you can't add on after this step.
  • Sleeves from the T-shirt and sparkly pom-poms for shoe covers - I saved the sleeves from the T-shirt and found that they went around the shoes perfectly. (This may not always pan out proportionally, so any extra fabric will do.) I put the finished edge of the sleeve around the bottom edge of an old pair of Bea's shoes. I attached the pompoms by tacking them down a few times with thread and then gluing them also. Attach the shoe covers by gluing around the bottom border and sewing or gluing around the top, as needed, for them to stay put. 
  • Fairy wings from party store with elastic ribbon for arms - The typical cheap set of fairy wings generally have terrible, oversized arms. The ones on these fell off after trying them on once. But that's ok, we replaced them with cuter, more functional ones anyway. : ) I used the same elastic ribbon I put on the waistband of the tutu. Pretty simple, just sew a circle of ribbon to the wings. I also had to make the wings less wide, so I just folded the fabric the wings were attached to, sewed it, and cut off the extra fabric.
  • For fairy dust, I used some gold glitter spray I found in the Halloween section at Walmart. Caution: That stuff is potent and messy, but makes little fairies happy. I might try to find some 90s style body glitter gel or something instead though.


And there it is, easy as that. It took me two or three nights to make them, and I think just about all of the supplies were purchased at Hobby Lobby. 

Give it a try next Halloween! If all else fails, the store bought options can be pretty cute too. : ) 

June 25, 2013

DIY Truffula Tree Decorations

In need of some Lorax themed decor? Check out these adorable DIY truffula trees! These were made for a baby shower, but can easily be adapted for birthday parties, bedrooms, or whatever your Lorax needs may be. 


Here's what you'll need. Everything can be found at your favorite craft store & maybe a trip to Target, too.


Supplies:
- Feather boa hair clip
- Craft wire
- Wire cutters/pliers
- Masking tape, plain and/or colored
- Permanent markers, black fine-point and regular yellow(or whatever color you want)
- Regular clear Scotch tape
- Plastic balloon sticks (make sure they are hollow)
- 2"strip from 12x12" scrapbook paper
- Burp cloth
- Ribbon 
- Scissors


Instructions for the base:
Step 1: Fold burp cloth into thirds.


 Step 2: Roll up the folded burp cloth, creating a spiral top as you roll.


 Step 3: Wrap the 2" strip of paper around the roll and tape.


 Step 4: Wrap the ribbon around the paper and tie.


Instructions for the truffula tree:
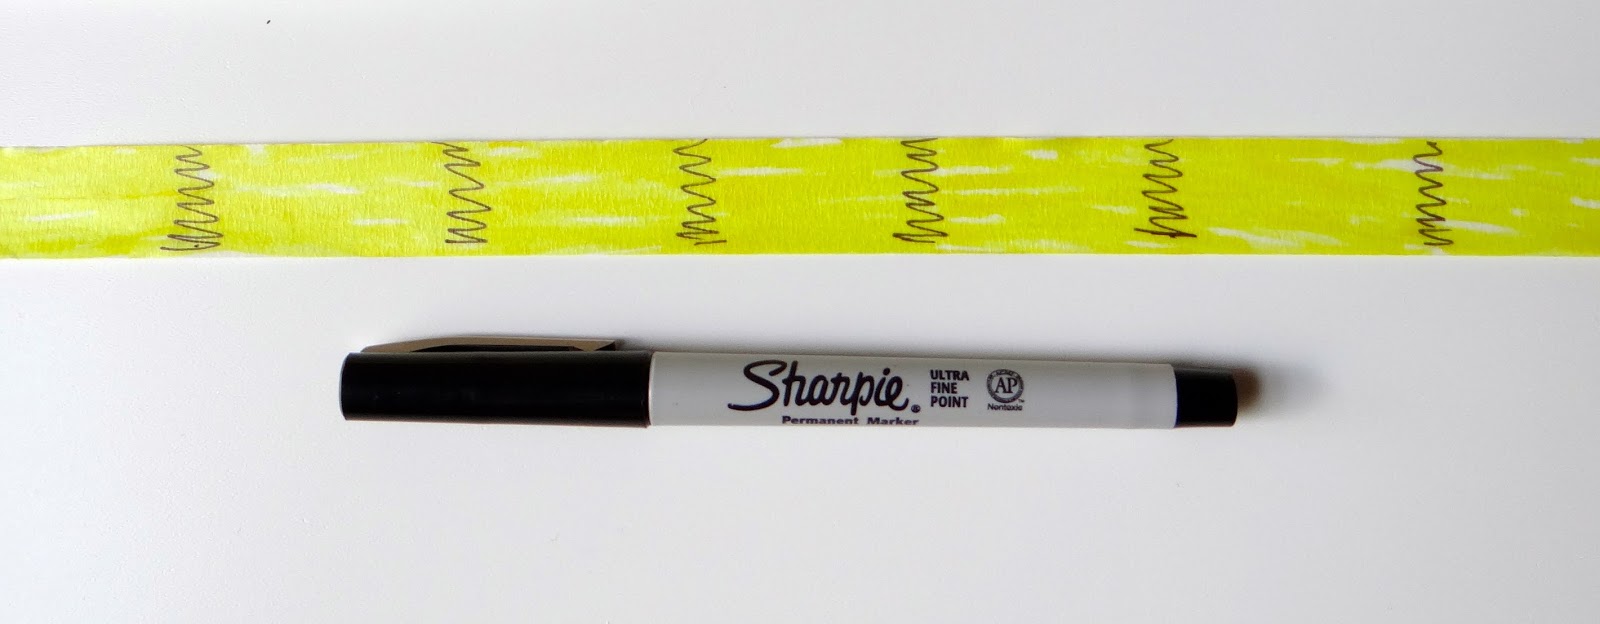
Step 1: If using plain masking tape, color the tape your desired color with a permanent marker.


 Step 2: Draw zig-zag lines over colored tape with black fine-point permanent marker.


 Step 3: Line your balloon stick up with the edge of the tape and stick it down.


 Step 4: Roll stick onto tape. You can easily fix any gaps or imperfections in the tape using your permanent markers to fill it in.


 Step 5: Gently bend the stick to create your tree trunk. I did not need a heat source to do this, but if you are having trouble, just put the sticks on top of (not inside!) a toaster oven or somewhere that they can warm up a bit and you should have no trouble bending the sticks.


Step 6: Cut the hair clip off of the boa.


Step 7: Cut a piece of wire ~5-6" long.


 Step 8: Bend the wire in half. Wrap the core of the boa into an "O" with the ends overlapping. Secure with the wire and twist.


Step 9: Assemble the tree by sticking the two wires into one end of your tree trunk. Then stick the other end of the tree trunk into the base.


And there you have it. A super cute and fun little truffula tree, just waiting to dance around in the breeze. Make a whole forest of them.


Feel free to leave a comment if you have any questions. Thanks for stopping by!

April 18, 2013

DIY Wedding


Today is our 4th anniversary so I wanted to post about that wonderful day! We were married in the backyard of the house I grew up in, where my parents still live. I posted on this when I first started my blog, but I decided my original post doesn't do it justice. : ) My sister and mom did almost all of the creative and leg work on our wedding and I am so thankful for all of their hard work. I love the fun and intimate detail that the DIY elements added. Here are a few of the things we did. 

We had homemade hors d'oeuvres, including this cheese selection. 
A cute spin on something old, something new, something borrowed, something blue.

We put together the bouquets ourselves from fresh flowers we ordered (anenomes and ranunculus). 

 My husband isn't much of a cake guy, so we made these chocolate covered strawberries instead of a groom's cake.

The cake was ordered from a local bakery (buttercream with orange-grand marnier, yum!), but we made the cake topper ourselves using the same type of flowers (stephanotis) I wore in my hair.

 My sister collected tons of neat bottles and white-washed them with paint on the inside. One of my very favorite things at the wedding.

We made our own menus and programs that we printed out ourselves. We also made paper flowers to put in with the napkin.

We made a bunch of tissue pompoms to hang from the tent. You can also see the favors - we filled the little boxes ourselves and hand-labeled them.

 The finished product. Such a fun night. : ) 


February 10, 2013

Kids' Reading Nook in a Closet

lwd reading nook for kids

I had a lot of fun rethinking Bea's room to make room for little brother, Jack. Creating a boy/girl shared room meant out with (some) pink and in with the blue... ok, aqua. It's a good sized room for one, but was a bit of a design challenge squeezing two kids in there. To help maximize space, I created a comfy-cozy reading nook in the closet.

Before

After

We bought neutral muslin to make the new curtains. Cheap and easy, and a great blank canvas for cute embellishments, like embroidery with a chunky yarn or even paint. Art work helped cover up the ugly grey electrical panel box in the back, as well as add color and make the space seem more playful and less like a closet. We still needed the space for storage so I divided the closet so that each kid would have their own area for their things. I turned the old cube storage shelf and moved it to Bea's end of the closet, and then bought a second one for Jack's end.


Extra soft sheepskin rugs cover the floor and there are lots of comfy pillows to lay on. I bought the large pillows at Ikea and made the pillow cases for them. You can never have enough pillows.


This space has worked great for us! Bea loves cuddling up in there with easy access to all of her books and toys. She also loves closing up the curtains for an easy secret hide away spot. I look forward to when Jack gets a little older and they can enjoy their reading nook together! I'll post more about the boy/girl shared room makeover soon.

December 18, 2012

DIY Pegboard Craft Center


I built this budget-friendly DIY pegboard craft center one weekend for Bea so she would have a place of her own to keep all of her art supplies and be crafty. I made a pinterest inspiration board (of course!) as I brainstormed this center and used some elements from those pins, and added my own elements too.

I know we all love IKEA for some reasonably priced goods. The table and chairs, magazine file, plastic placemat, magnets, wall-mounted storage bars, hanging basket and plastic hooks on the bars, and the plastic cups and little bins with lids were all purchased there. All items were pretty cheap, but the table is such a great deal --- seriously 2 chairs and a table for $19.99? Can't beat that! The other little clear plastic bins are from the Container Store and are just mounted with pegboard hooks. I attached the mason jars with plastic coated wire I got at Home Depot. Before mounting the board, I just wrapped the wire around the neck of the jar a bunch of times and then stuck the two ends through the holes and twisted them together in the back until the wire was tight (sort of like the way they attach dolls to their box). I like the mason jars on there a lot and wished I had used 1 or 2 more after I hung the board up.


I got all of the supplies for the pegboard itself at Home Depot. This was my first pegboard (and wood purchasing) experience and I learned a few things... 
  • You have to make a frame to mount the pegboard on. (Duh!)
  • Ask the person at the hardware store to use the electric saw rather than the handsaw for accurate wood cutting.
  • IKEA wall mounted storage bars do not fit the pegs.
  • A sample size of paint is perfect for painting your pegboard and they make these adorable little mini-rollers which work perfectly. Paint goes on easily, but scrapes off easily too so be careful with your screws when mounting the pegboard to the wall.
  • There isn't a magical store of cool stuff to hang on pegboards. Bummer.

I wanted a place where Bea could hang up her art work to dry or to admire, so the magnetic dry erase board was a perfect solution --- another place for drawing and to practice letters and numbers, as well as a drying rack. I used a board with adhesive mountings to avoid having to put screws in the door. The tap lights are also a self adhesive solution for lighting and are cheap and super kid friendly.  I used a magazine file to store paper supplies in a space-conscious way. Finally, a plastic placemat was a perfect finish to help protect the table. I got both one completely flat one for everyday use and also one that is more like a serving tray with raised edges for projects with things that will roll away or spill.


Bea has been loving having her own area in the house and all of her supplies at her fingertips! It's a pretty easy project that is definitely worth the effort and can be done for less than $100. 

October 24, 2012

DIY Magnetic Fishing Pole Toy

I made this easy magnetic fishing pole toy for Bea in just a couple of hours using left over supplies we had around the house. We all had fun going fishing! : ) 


Supplies:
- Fabric (scraps work)
- Light marker or fabric pencil
- Scissors
- Cotton balls (or cotton stuffing)
- Pole (I used a scrap 1x2, just be cautious it's nothing little ones could impale themselves with!)
- Ribbon or strong yarn
- Staple gun (not required)
- Small magnets
- Needle
- Thread & sewing machine
-OR-
-Yarn & large needle*

Step 1: Fold the fabric on itself so that the back of the fabric is exposed & draw some basic fishies. I will say that the fish shape at the top of the below picture worked out best overall for me.


Step 2: Cut out the fishes, leaving ~1/2" border. (There will be two pieces of fabric per fish since you folded it before cutting.)


Step 3: Sew around the fishes following the outline you drew. Leave ~1" unsewn so you can turn the fishes right-side in and also stuff them. I found the easiest place to do this was along the body of the fish, not on a corner!

Step 4: Turn the fish right-side in, drop a magnet in and put it where the mouth is, and stuff them. I used cotton balls because that's what I had and I didn't want to get a huge bag of cotton stuffing just for these little guys. Bea had a lot of fun helping me with this part!

Step 5: Sew up the 1" gap you left using a needle and thread.


*If you don't have a sewing machine or don't want to use one, you can easily do this by just hand sewing with a chunky yarn or something. I would still just cut out the fishes, but leave the fabric so the outside surface is outside and sew around the border, still leaving ~ 1" gap for stuffing. You could even try using paper (instead of fabric) and a plastic needle with yarn and the (older) little ones could help.

Almost done! On to the fishing pole...

Step 6: Secure the end of a piece of ribbon (or strong yarn) to the end of the stick. I used a staple gun for this, but if your pole isn't compatible with this, just tie it on and/or secure it with some glue. Once I stapled the end, I wrapped the ribbon around multiple times and then stapled the ribbon to the stick again.


Step 7: Pull the now attached ribbon out until you have ~2 feet of ribbon hanging from the stick. You can always wrap excess around the stick, or easily trim it, if you decide it's too long later.

Step 8: Get a small square of fabric (will vary in size depending on the size of your magnet), put your magnet in the center, and fold up the sides. Wrap the end of the ribbon around it to make a sort of purse and secure with a knot. This is your lure & hook and now you are done!


For extra fun:
- You can embellish your fish and make them extra cute using fun buttons for their eyes or by attaching random sequins to look like scales.
- You could make it a fun learning game by printing or sticking numbers, letters, or shapes to the fish. Then either have a grab bag of the different numbers or letters that they can draw, or you can just call one out that they then have to fish for! Perfect for a rainy day, or getting your kids engaged in learning.
- If you have a million alphabet fridge magnets like we do, you could skip making the fish and go fishing for letters instead.

October 2, 2012

Cute DIY Wall Storage


I made some very low cost, easy DIY wall storage using wrapping paper, Mod Podge, and wall mounted plastic file holders. I use them for book storage in Bea's room, but they could easily be used to store toys, diapers, and many other items.

To cover the holders I used these simple steps:

Step 1) Gather supplies.

You will need:
- Wall mounted file holder
- Wrapping paper, fabric, or other type of covering
- Scissors
- Mod Podge
- Paint brush
- Credit card, or other device you can use for smoothing the paper
(- Screw driver/drill for mounting to wall)

Source
I think I found the clear plastic wall mounted file holders at Target for about $6 each, but they should be at most office supply stores. I purchased some cheap wrapping paper at Target - I think the thin stuff is easier to work with so cheap is good. I used two different, complimentary patterns that fit the scheme of my room - one for the outside and one for the inside & the rim. You could also use fabric.

Step 2) Cover the inside of the bin.

Don't worry about the holes the screws go through, you can cut through the paper after it dries. There is a potential for rippling in the paper, so use a thin layer of Mod Podge and be tactful when putting the paper on - start at one end and use a credit card or something to push the paper down from one side to the other. I just used one piece of paper that I cut generally to size and cut a wedge out of the bottom corners of the paper so that there wouldn't be a lot of excess at the fold. You can kind of snip as you go  if you find the paper is bunching in the corners when you are gluing. Make the piece of paper big enough to fold over the top of the bin to cover the rim. You obviously don't have to be quite as careful about rippling or little imperfections when putting on the paper inside as you do when covering the outside. It's nice to get an idea of how the paper and glue work together on the inside first so you have a better idea when doing the more visible outside.
Step 3) Cover the outside of the bin.

To do the outside I used 3 separate pieces of paper - one for each of the sides and one for the front that tucked under to cover the bottom as well (sections seen in above photo). I cut them generally to size and again painted on Mod Podge as glue. I put on the two sides first and then put the front on last. I was a little more precise when cutting the front piece so that the edges were straight along the corners and top.

Step 4) Apply 2 layers of Mod Podge all over the glued on paper to seal and protect.

Allow the Mod Podge to dry for several hours between coats. This may be a good time to cut through the holes for the screws before the paper gets too thick and hard, but you can always drill through if necessary.

Step 5) Let everything dry for at least 24 hours and then hang on the wall.


One cool thing about these DIY wall bins is that they are adaptable. Now that the surface has some grip to it, you can easily paint over the paper if color schemes change down the line, as they have for us. Bea will be sharing her room with Jack when he arrives, so I needed to lose some pink and get some blue in the room. I easily painted the outside of these book holders with aqua acrylic paint and left the inside paper portion so that it would still cover the rim and add a little more character. I sealed the paint with a layer of Mod Podge to help protect the paint job. Easy peasy!