November 21, 2013

DIY Peter Pan and Tinkerbell Costumes


Homemade Halloween costumes are the best! This year Halloween coincided nicely with Bea's current movie obsession - Peter Pan. (I'm not complaining!) Here is what I came up with for a quick and easy  DIY Tinkerbell and Peter Pan Halloween costume. 

DIY Peter Pan Costume:
  • Green felt for the hat - two layers, cut out a triangle hat shape and go for it. Sew the triangle, and then finish the edges after trying it on to make sure it's the right shape. I cut a little hole in the side of the hat to stick the red feather into. Jack kept his hat on for 10 seconds at a time. : ) Extra feathers come in handy. 
  • Simple, green cotton fabric for the shirt - I folded the fabric in half, laid one of his bigger shirts down on top of it so that the shoulders lined up with the fold in the fabric, and traced a line around the shirt. Leave it long, like dress length. I then cut the fabric with about 1.5-2" extra around the border. Cut a hole for the head using the shirt you used to trace as a template. Then cut a deep "V" neck. Sew around the cut edges, leaving the head, arm and torso holes open, of course. Turn inside out and cut "V"s out of the edges the sleeves and torso. Take the top points of the "V"neck and tack them down with a few stitches to create little lapels. If the head hole isn't big enough to go over your little guys head (my baby has a huge head!), then just make the "V" deeper and you can always use leather string to lace it back up, if necessary. 
  • Leather rope for belt - I found some at Hobby Lobby. Don't forget your wooden knife. : ) 
  • Little girl leggings - Men in tights are the cutest. I had to get brown because green leggings are hard to find.

DIY Tinkerbell Costume:
  • Plain, lime green T-shirt - The one I used was over-sized (like a youth L), and I cut it to make it fit. First I cut off the neck and sleeves so that those finished edges were gone. Then I laid down one of her dresses/shirts on top of the T-shirt and traced around it, and cut around the edges with 1.5-2" extra around the border. I re-sewed the edges and finished the sleeves with a simple stitch around the perimeter. Instead of finishing the neck in the same way, I used an elastic ribbon and sewed it on top of the edge of the neck. I kept the shirt long, like dress length, and cut out a "V" pattern on the bottom edge. This gave a little extra coverage with the sheer tutu, but she wore some little shorts too.
  • Green tulle and elastic for the tutu - I used two different shades - a lime green and a kelly green. For the most part, I used this tutorial to make the tutu. Basically, I just sewed a waistband of elastic (I used 1" wide), cut tulle into strips of different widths and lengths, and then tied them on to the elastic band. I did longer pieces first, and then shorter pieces on top. I cut the ends so that they came to a point. To make it look more finished I sewed elastic ribbon on top of the waistband, but make sure you are happy with the fluffiness of the tutu because you can't add on after this step.
  • Sleeves from the T-shirt and sparkly pom-poms for shoe covers - I saved the sleeves from the T-shirt and found that they went around the shoes perfectly. (This may not always pan out proportionally, so any extra fabric will do.) I put the finished edge of the sleeve around the bottom edge of an old pair of Bea's shoes. I attached the pompoms by tacking them down a few times with thread and then gluing them also. Attach the shoe covers by gluing around the bottom border and sewing or gluing around the top, as needed, for them to stay put. 
  • Fairy wings from party store with elastic ribbon for arms - The typical cheap set of fairy wings generally have terrible, oversized arms. The ones on these fell off after trying them on once. But that's ok, we replaced them with cuter, more functional ones anyway. : ) I used the same elastic ribbon I put on the waistband of the tutu. Pretty simple, just sew a circle of ribbon to the wings. I also had to make the wings less wide, so I just folded the fabric the wings were attached to, sewed it, and cut off the extra fabric.
  • For fairy dust, I used some gold glitter spray I found in the Halloween section at Walmart. Caution: That stuff is potent and messy, but makes little fairies happy. I might try to find some 90s style body glitter gel or something instead though.


And there it is, easy as that. It took me two or three nights to make them, and I think just about all of the supplies were purchased at Hobby Lobby. 

Give it a try next Halloween! If all else fails, the store bought options can be pretty cute too. : ) 

June 25, 2013

DIY Truffula Tree Decorations

In need of some Lorax themed decor? Check out these adorable DIY truffula trees! These were made for a baby shower, but can easily be adapted for birthday parties, bedrooms, or whatever your Lorax needs may be. 


Here's what you'll need. Everything can be found at your favorite craft store & maybe a trip to Target, too.


Supplies:
- Feather boa hair clip
- Craft wire
- Wire cutters/pliers
- Masking tape, plain and/or colored
- Permanent markers, black fine-point and regular yellow(or whatever color you want)
- Regular clear Scotch tape
- Plastic balloon sticks (make sure they are hollow)
- 2"strip from 12x12" scrapbook paper
- Burp cloth
- Ribbon 
- Scissors


Instructions for the base:
Step 1: Fold burp cloth into thirds.


 Step 2: Roll up the folded burp cloth, creating a spiral top as you roll.


 Step 3: Wrap the 2" strip of paper around the roll and tape.


 Step 4: Wrap the ribbon around the paper and tie.


Instructions for the truffula tree:
Step 1: If using plain masking tape, color the tape your desired color with a permanent marker.


 Step 2: Draw zig-zag lines over colored tape with black fine-point permanent marker.


 Step 3: Line your balloon stick up with the edge of the tape and stick it down.


 Step 4: Roll stick onto tape. You can easily fix any gaps or imperfections in the tape using your permanent markers to fill it in.


 Step 5: Gently bend the stick to create your tree trunk. I did not need a heat source to do this, but if you are having trouble, just put the sticks on top of (not inside!) a toaster oven or somewhere that they can warm up a bit and you should have no trouble bending the sticks.


Step 6: Cut the hair clip off of the boa.


Step 7: Cut a piece of wire ~5-6" long.


 Step 8: Bend the wire in half. Wrap the core of the boa into an "O" with the ends overlapping. Secure with the wire and twist.


Step 9: Assemble the tree by sticking the two wires into one end of your tree trunk. Then stick the other end of the tree trunk into the base.


And there you have it. A super cute and fun little truffula tree, just waiting to dance around in the breeze. Make a whole forest of them.


Feel free to leave a comment if you have any questions. Thanks for stopping by!

April 18, 2013

DIY Wedding


Today is our 4th anniversary so I wanted to post about that wonderful day! We were married in the backyard of the house I grew up in, where my parents still live. I posted on this when I first started my blog, but I decided my original post doesn't do it justice. : ) My sister and mom did almost all of the creative and leg work on our wedding and I am so thankful for all of their hard work. I love the fun and intimate detail that the DIY elements added. Here are a few of the things we did. 

We had homemade hors d'oeuvres, including this cheese selection. 
A cute spin on something old, something new, something borrowed, something blue.

We put together the bouquets ourselves from fresh flowers we ordered (anenomes and ranunculus). 

 My husband isn't much of a cake guy, so we made these chocolate covered strawberries instead of a groom's cake.

The cake was ordered from a local bakery (buttercream with orange-grand marnier, yum!), but we made the cake topper ourselves using the same type of flowers (stephanotis) I wore in my hair.

 My sister collected tons of neat bottles and white-washed them with paint on the inside. One of my very favorite things at the wedding.

We made our own menus and programs that we printed out ourselves. We also made paper flowers to put in with the napkin.

We made a bunch of tissue pompoms to hang from the tent. You can also see the favors - we filled the little boxes ourselves and hand-labeled them.

 The finished product. Such a fun night. : ) 


March 20, 2013

A nursing mama's favorite travel accessory --- The Oversized Scarf!

So maybe you're more comfortable whipping your boob out and feeding your baby in public than me, but even with baby two I personally still opt for a covered up approach when nursing on the go. Baby blankets have been my usual go-to for this. There are plenty of nursing aprons you can buy. But when traveling, less is more. My bag is stuffed enough as it is, I'm not wasting precious space on a nursing apron! My easy, stylish solution for a wearable nursing wrap, blanket, and (let's face it) spit-up cover up is this little trendy gem.... an oversized scarf. 


H&M has some winners


Some reasons you should wear an oversized scarf on your next travel venture:
  • Doubles as a blanket or pillow for baby (or fussy husband) 
  • When the inevitable spill, spit-up, leak, etc. happens you can easily cover up or distract from that spot on your shirt you want to disappear
  • Classes up your favorite travel lounge wear & top knot
  • Layers! Your best friend on a who-knows-what-temp-it-will-be airplane
  • Maybe it's not as glaringly obvious that you're nursing... ignore the baby feet kicking out. :)  I mean it is what it is, but I also prefer blending in over the stares from fellow people watchers. They can just notice how awesome your scarf is and then keep those eyes moving. 
  • If nothing else, traveling is unpredictable and having an extra sheet of fabric creates a good back up EVERYTHING. Any traveling mama knows an extra blanket, burp cloth, pillow, play mat, changing mat, cover up, etc. is worth it's weight in gold in a pinch. On our first trip traveling as a family of four, our connecting flight was cancelled and our layover suddenly went from 1 hour to 8 hours. EIGHT hours stuck at in airport with a 3 year old and 4 month old and nothing but your carry on luggage! Could have been so much worse, but my scarf saved the day. Just kidding. Use the extra space to pack extra diapers.
Tip: Go for washable, breathable material and pick a pattern that will hide imperfections, spills, etc.


February 10, 2013

Kids' Reading Nook in a Closet

lwd reading nook for kids

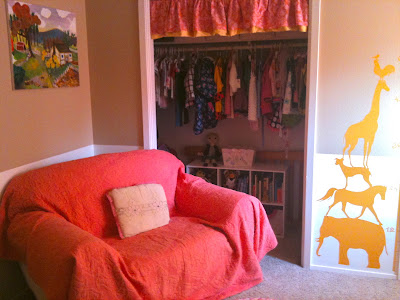
I had a lot of fun rethinking Bea's room to make room for little brother, Jack. Creating a boy/girl shared room meant out with (some) pink and in with the blue... ok, aqua. It's a good sized room for one, but was a bit of a design challenge squeezing two kids in there. To help maximize space, I created a comfy-cozy reading nook in the closet.

Before

After

We bought neutral muslin to make the new curtains. Cheap and easy, and a great blank canvas for cute embellishments, like embroidery with a chunky yarn or even paint. Art work helped cover up the ugly grey electrical panel box in the back, as well as add color and make the space seem more playful and less like a closet. We still needed the space for storage so I divided the closet so that each kid would have their own area for their things. I turned the old cube storage shelf and moved it to Bea's end of the closet, and then bought a second one for Jack's end.


Extra soft sheepskin rugs cover the floor and there are lots of comfy pillows to lay on. I bought the large pillows at Ikea and made the pillow cases for them. You can never have enough pillows.


This space has worked great for us! Bea loves cuddling up in there with easy access to all of her books and toys. She also loves closing up the curtains for an easy secret hide away spot. I look forward to when Jack gets a little older and they can enjoy their reading nook together! I'll post more about the boy/girl shared room makeover soon.

January 10, 2013

Dancing in the rain

I love times like these when I can just sit back and watch my Bea. Catching rain drops on her tongue, watching the water drip off her nose, squinting up into the sky to watch the drops fall. Such pure innocence exploring the world around her, experiencing life so fully. Bea has been adjusting wonderfully to not being the sole center of attention now that Jack is here. No matter how busy things get, I always want to slow down and savor these moments with her that I know will pass by all too quickly. Just lovely.


January 5, 2013

Jack


It is high time I introduced this boy! Jack David was born November 6, weighing 8lbs 13oz and measuring 20 inches long. I went in the night before to start the induction and he arrived at 830am, just two hours after I started the Pitocin. Despite a little weirdness at first with the epidural & laying on my back causing my blood pressure to drop, it was such a super easy delivery and he has been such a super easy baby. I am loving being a mom of two! Bea has been a great big sister and it is so much fun watching them interact. Jack is just as sweet as can be and I am feeling very lucky to have a happy and healthy family of four.